
PAINTED DROP CLOTH RUG DIY
Area rugs can really tie a room together, but they can also be really expensive. So, why not go the diy route and make your own with just a drop cloth and some paint?!
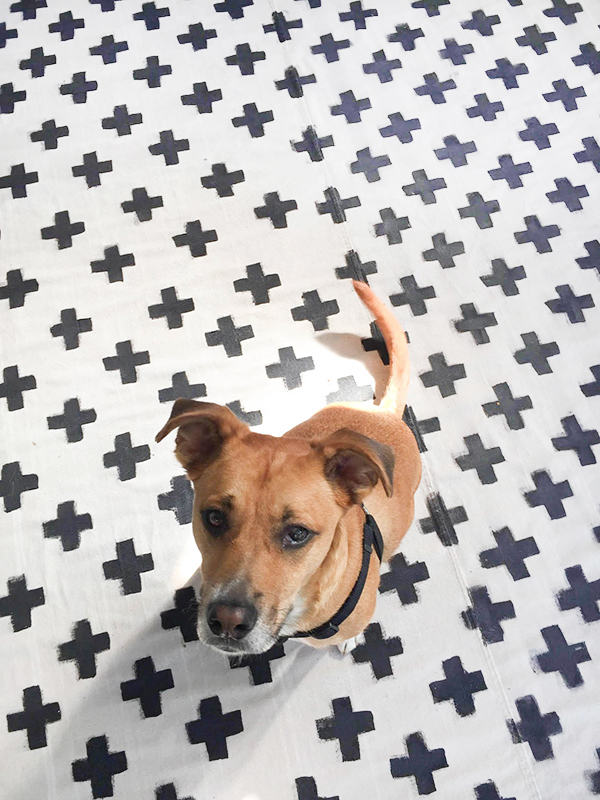
After finishing my table and chair makeover, I still felt like something was missing from the space, and that’s when I realized that I really needed a rug. Not wanting to spend a fortune on a rug that will spend its life out on a porch, I decided I wanted to go the DIY route. Pinterest had some interesting ideas, but it was drop cloth rugs that really caught my attention. However, I felt a little discouraged while looking at tutorials, when I saw that most of them used stencils. Something about cutting them out, having them shift around, and tape them down seemed unappealing to me. That’s when I realized that using a stamp could be the perfect solution for my drop cloth rug!
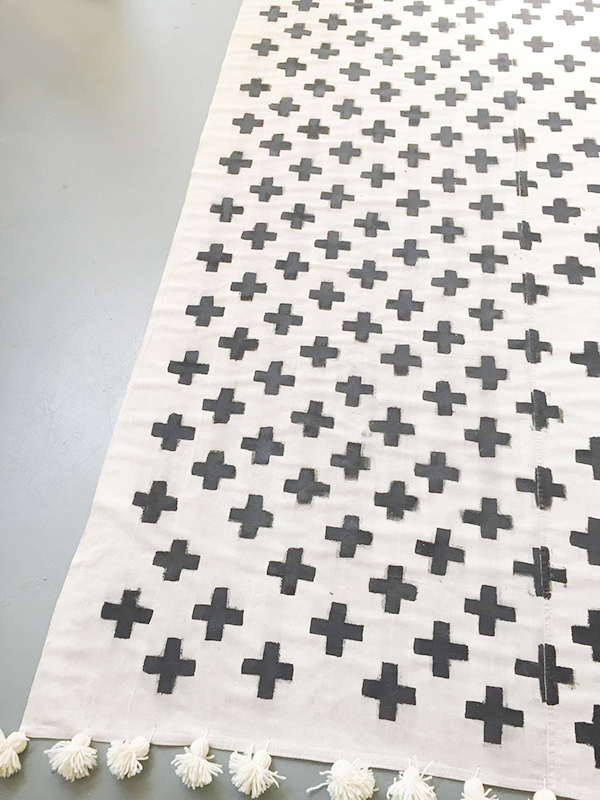
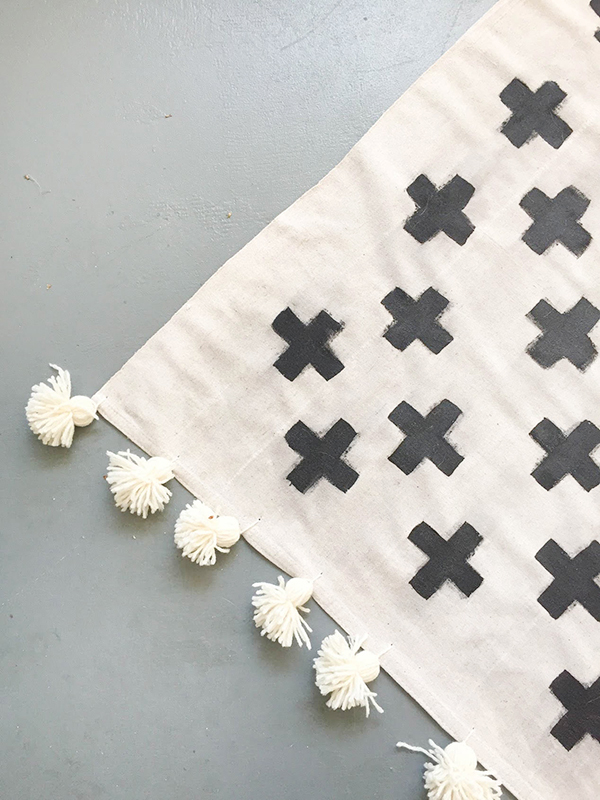
My painted drop cloth rug is inspired by Scandinavian simplicity, and it really transformed my space!
Supplies:
Dropcloth 6’x9′ (I purchased mine at Lowes)
Tarp
Styrofoam
Small flat paint brush
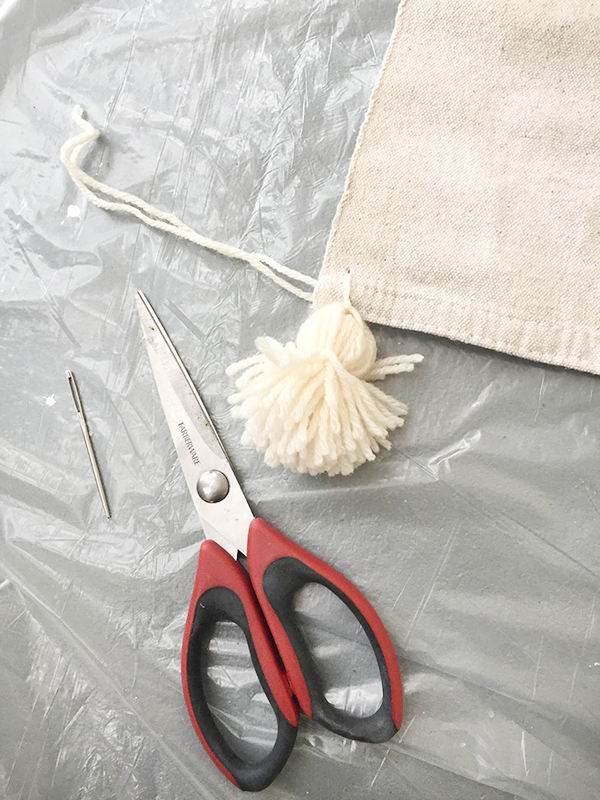
Tapestry Needle
Scissors
Drop Cloth Rug
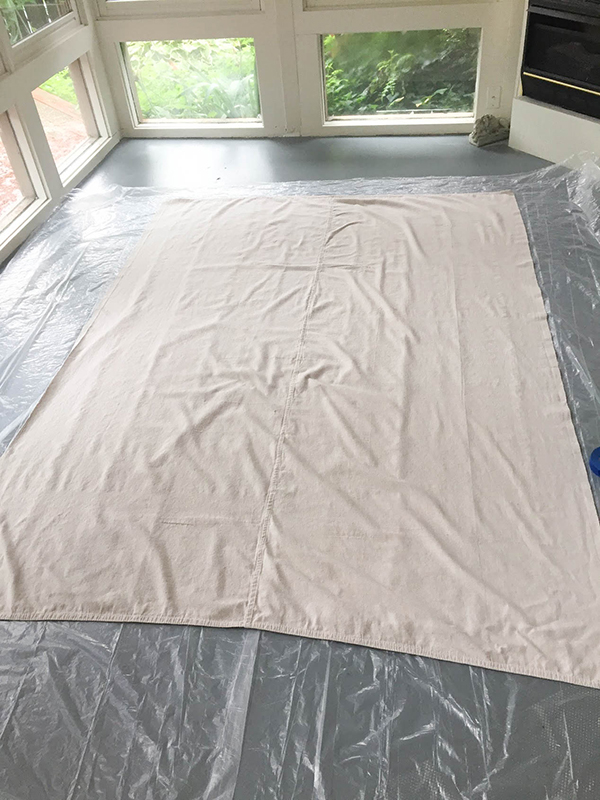
01. If you ever plan on washing your drop cloth, be sure to prewash it before you paint it. This will prevent any shrinkage in future washes, which will protect your design. I ran my drop cloth through the drier twice to work out wrinkles
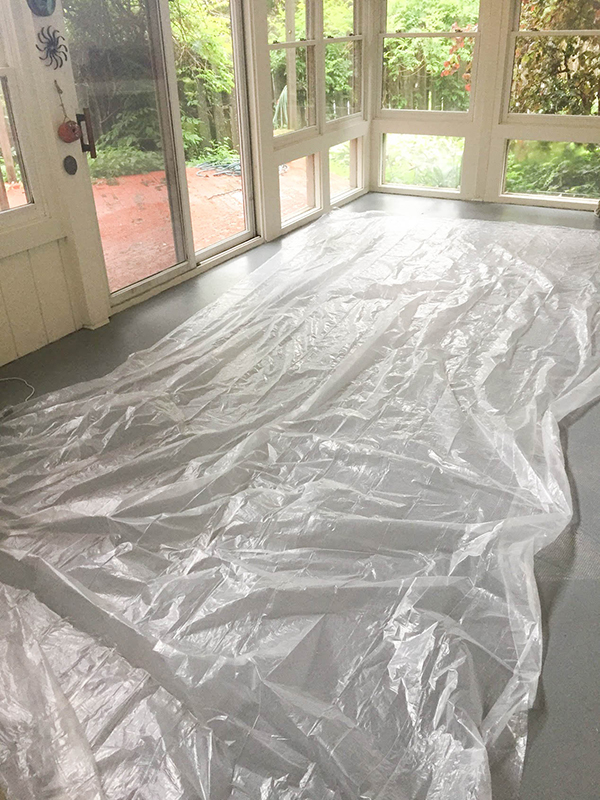
02. While the drop cloth is running, you’ll want to prep your workspace. It may seem redundant to put a tarp down for a drop cloth, but this will protect your work surface later
03. Time to iron out those last stubborn wrinkles! If you are like me and hate ironing, this is probably the most tedious step. Fortunately for me, running the drop cloth through the drier twice worked out most of the wrinkles, but I did have to go through and run the iron over it. When satisfied, you want to carefully carry it over to where you laid down your tarp, and smooth it out again
04. Create your plus stamp using a block of styrofoam. I was able to salvage some thick styrofoam from some packaging materials to use as the stamp. I cut a block to the size of 5″x5″. You can either use a plus sign template or hand draw it onto the foam block. I chose to hand draw on mine because I like having a quirkier look
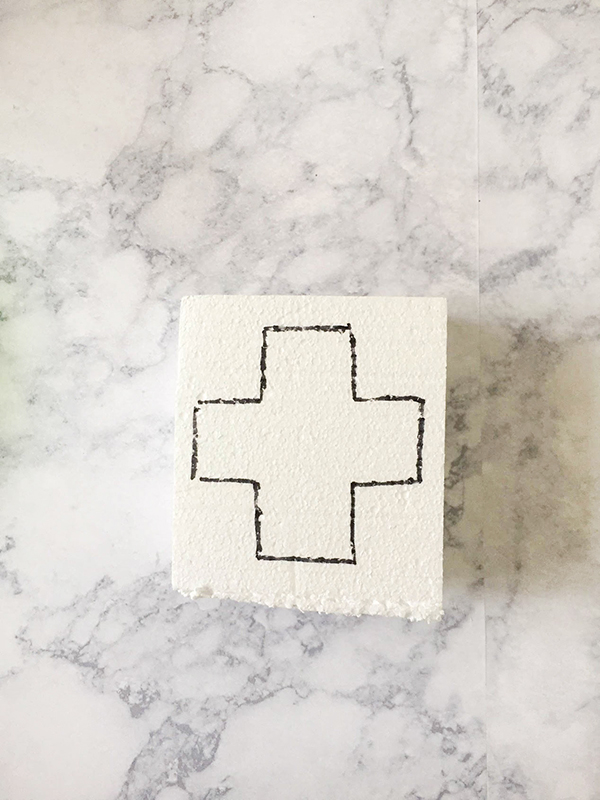
05. Cut out negative space around plus sign with an X-Acto blade. You don’t have to cut super deep, but you do want to make sure you cut enough off to leave a good imprint
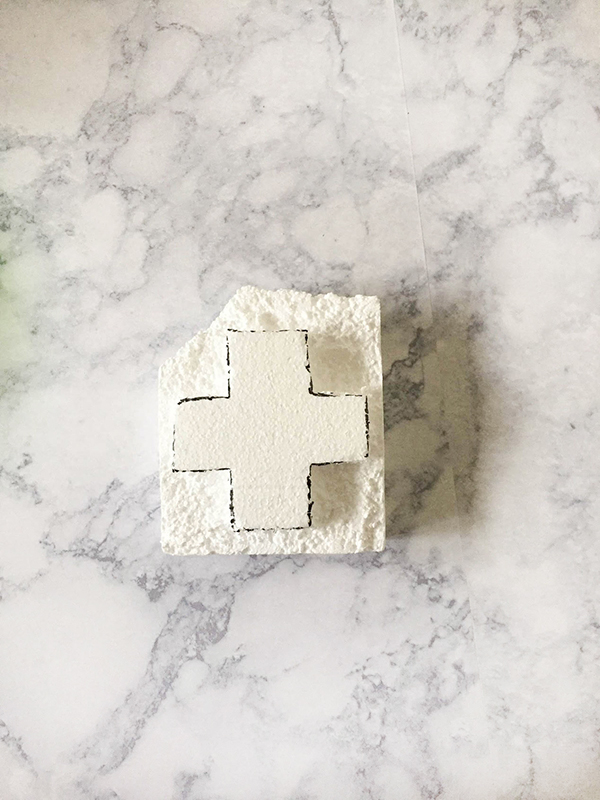
06. Determine how much space you want to leave around the margins of the rug. You don’t want the pattern to go right up to the edge, so figure out how much space to leave around the border. I gave mine a 2 inch margin
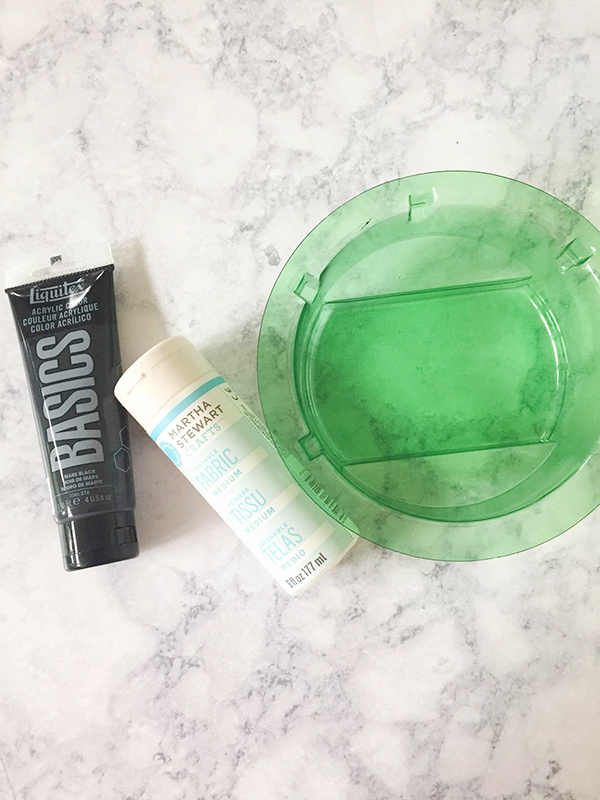
07. In a paint tray, mix in 1 part fabric medium to two parts paint
08. Either dip or brush on the paint onto the stamp. Then Start stamping across the top of the drop cloth, with consistent spacing
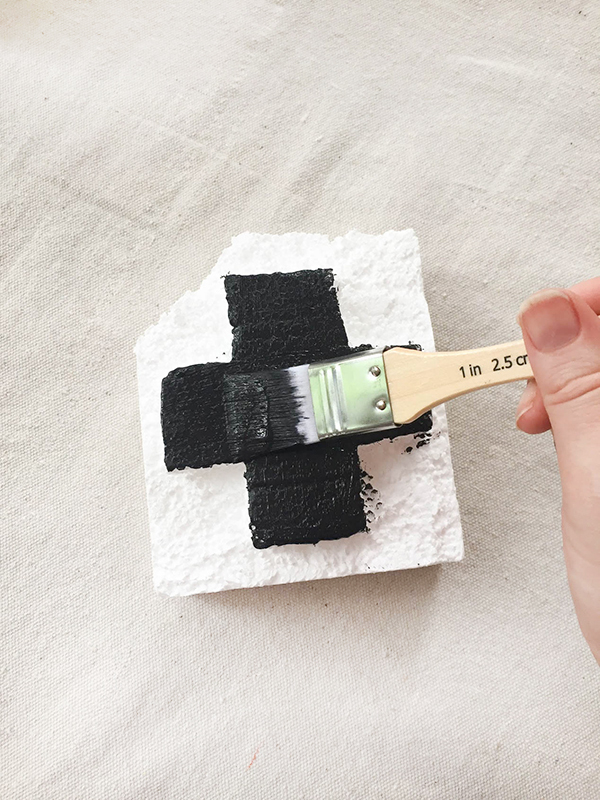
09. Come in with a flat brush and touch up the stamp marks as needed
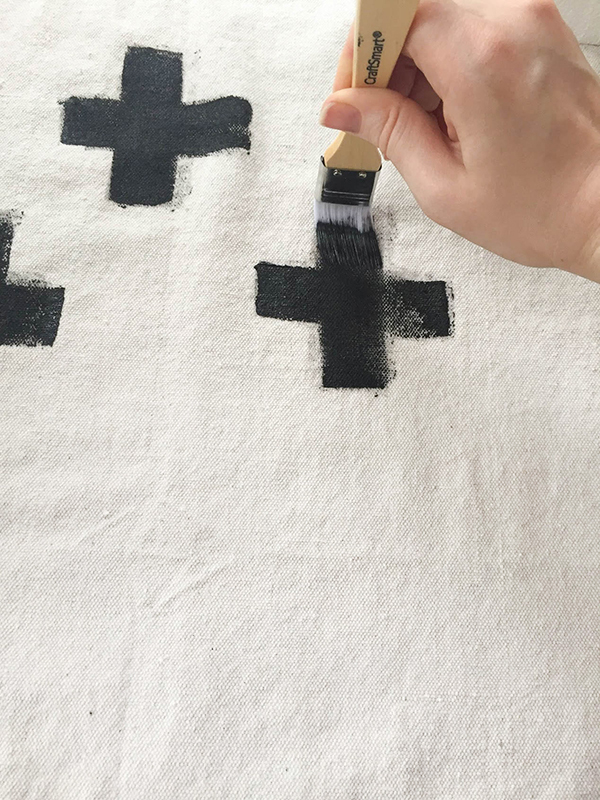
10. Repeat steps 9 and 10 on the next row. To make things even, I matched up the upper left corner of my stamp with the lower right of the plus sign of the row above
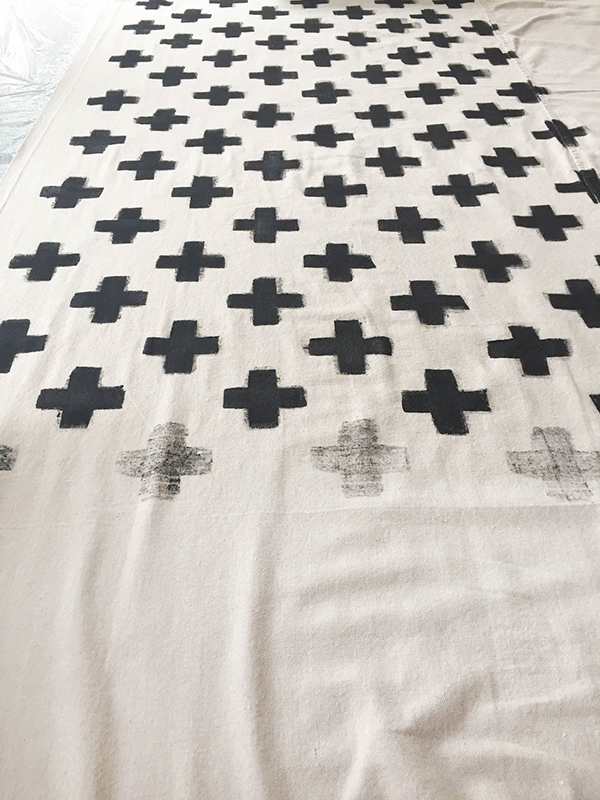
11. Repeat steps 9-10 until the rug is covered
12. Let dry for 24 – 48 hours
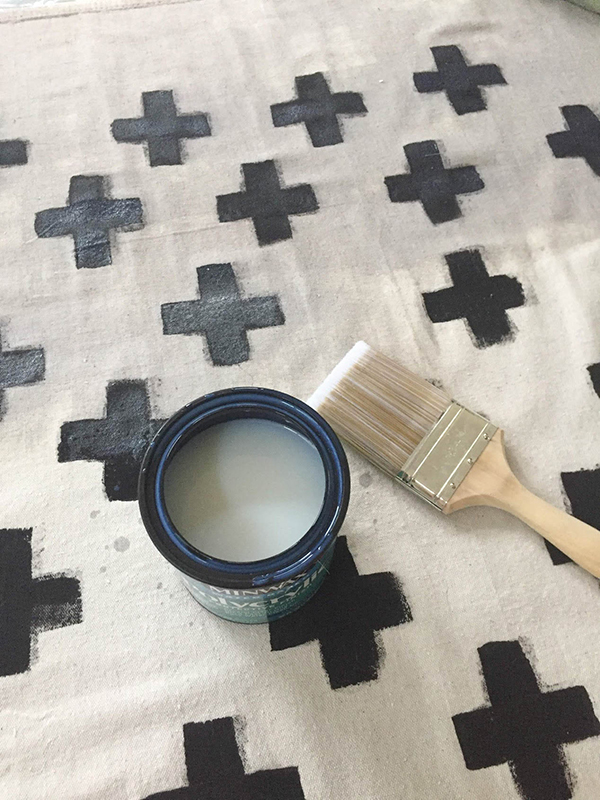
13. Once the paint is thoroughly dry, Apply a layer of the Minwax Polycrylic to the entire rug. This will make the rug look darker, but it will lighten up while drying. It will act as a sealant and will make the rug stiff
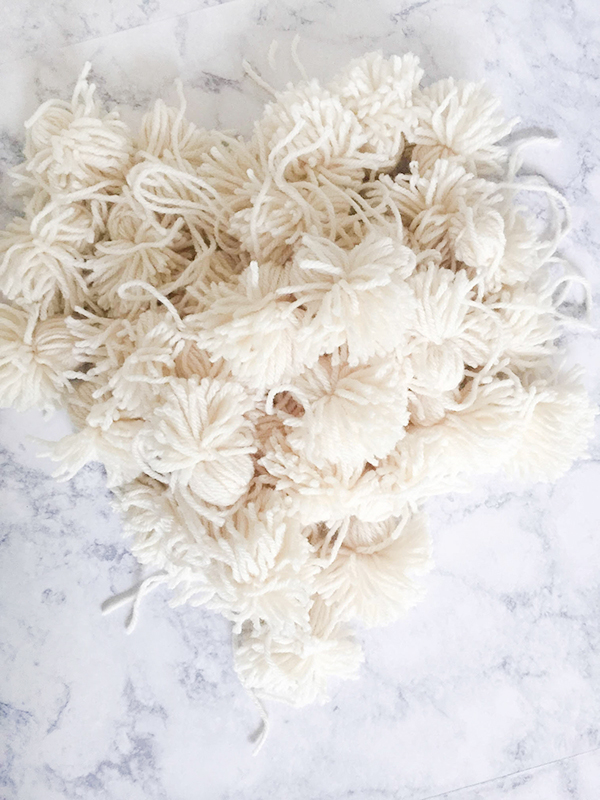
14. While the rug is drying start making the tassels
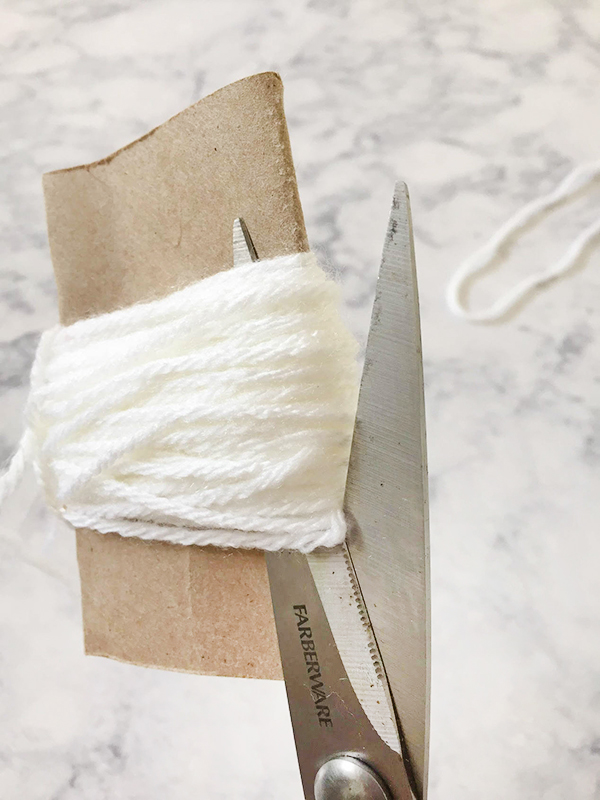
15. We want the tassels to be a consistent length, so using a flattened toilet paper roll, begin wrapping yarn around it. I like full and fluffy tassels, so I wrapped it a lot. Whatever thickness you decide on, make sure to try to consistently wrap the same thickness on all of the tassels
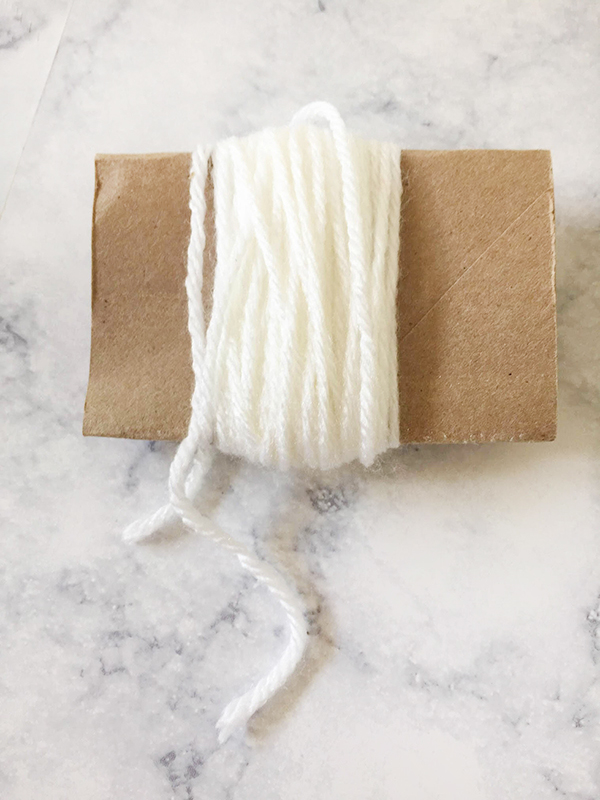
16. Once you are done wrapping, snip the yarn. Then snip off two pieces of yarn from your skein of yarn
17. Take one piece of yarn, and pull it under the wrapped layers and up to the top and double knot it. This string will be used to attached to the rug, so keep it long and separate from the rest of the tassel
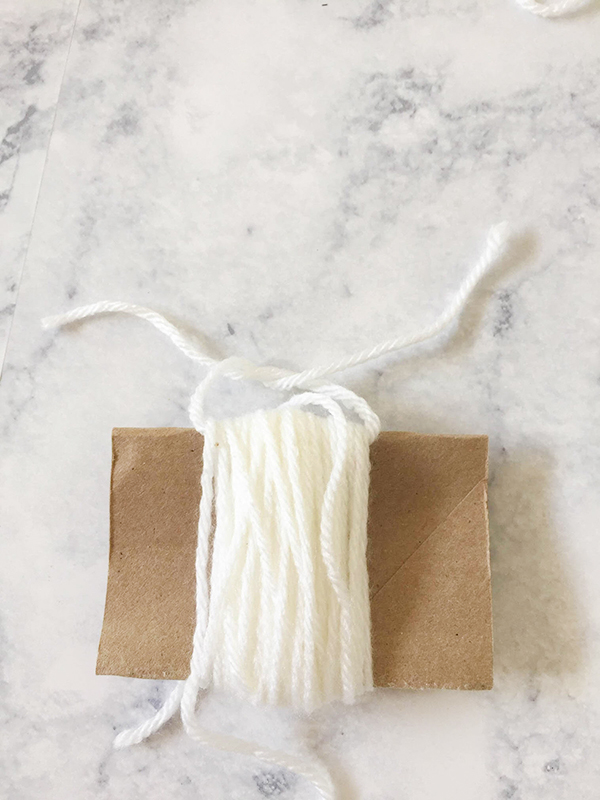
18. Take your scissors and cut through the very bottom of the tassel
19. Take the other piece of string and lay the tassel about a fourth of the way down from the top
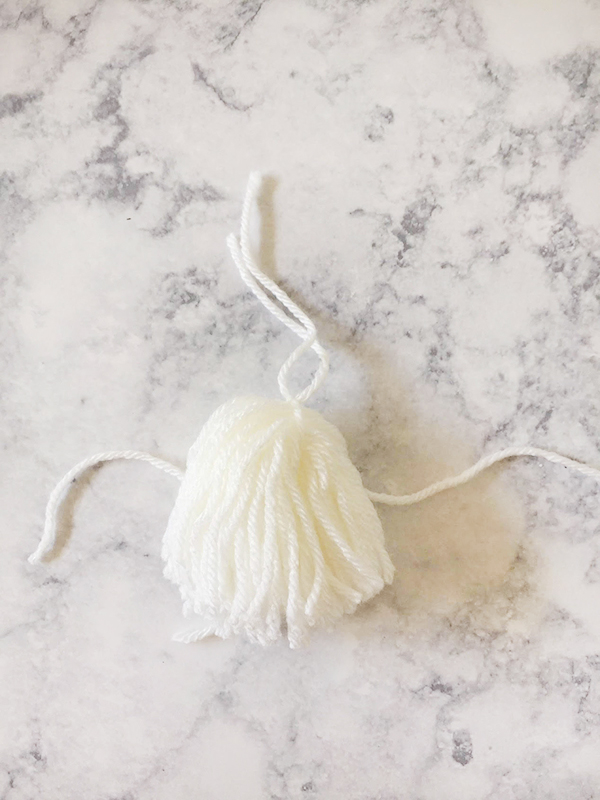
20. Tie a tight knot, then flip the tassel over and tie another tight knot. Repeat this until you feel the tassel is secure
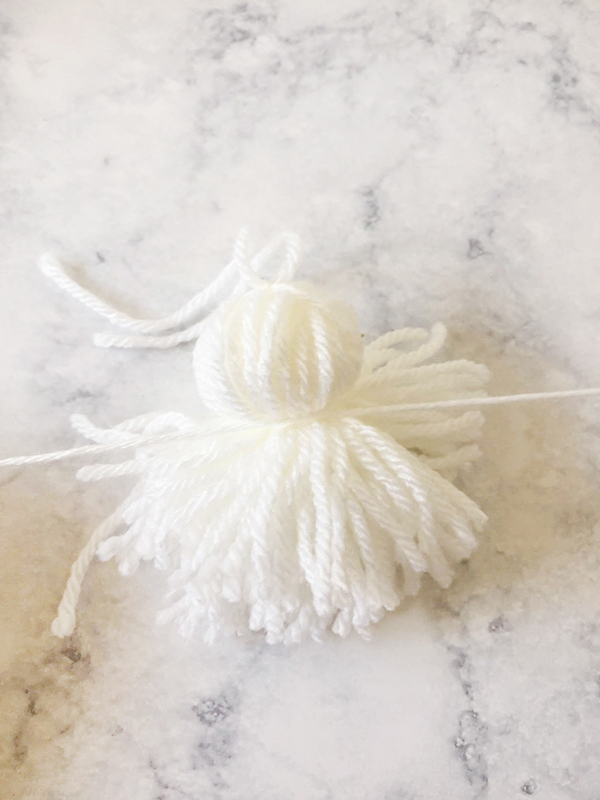
21. Trim tassel as needed
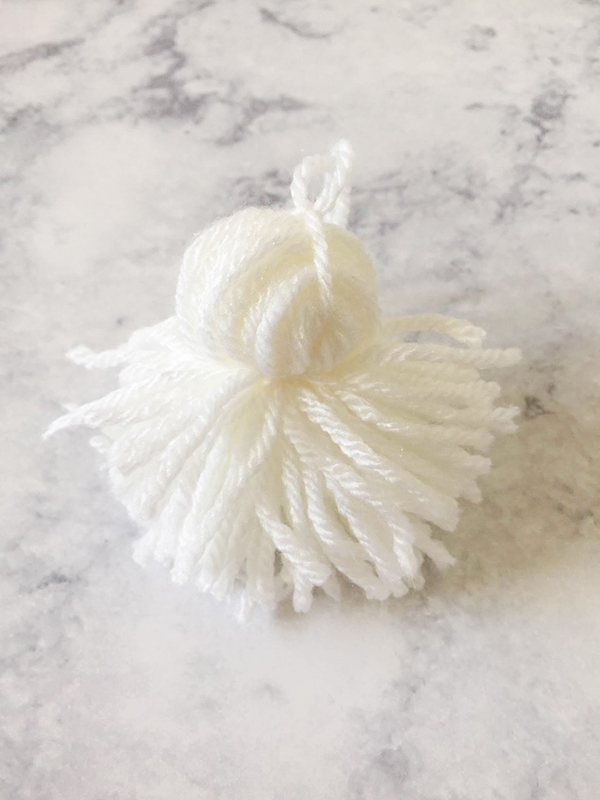
22. Once the rug is dry, you can start sewing on the tassels to the shorter sides of the rug. I used 17 for each side, but I also made a few extra just in case
23. Space out where you want the tassels to go. You can either measure or eye this
24. Take your tapestry needle, and thread one of the strings on the top of the tassel. Then, poke the need through the top of the rug, and out through the bottom
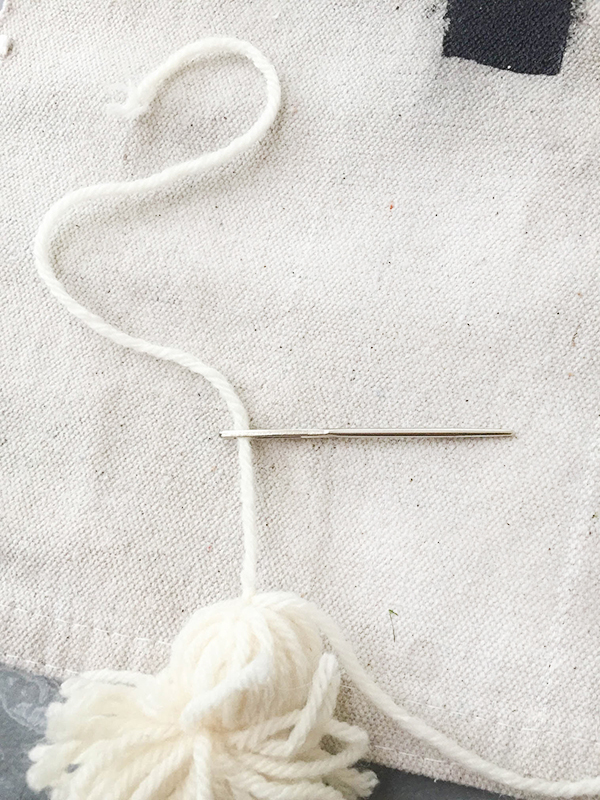
25. Pull the tassel a bit so it rests off the edge of the rug, not on top of it
26. Tightly knot it on the edge of the rug. Keep knotting until it feels secure
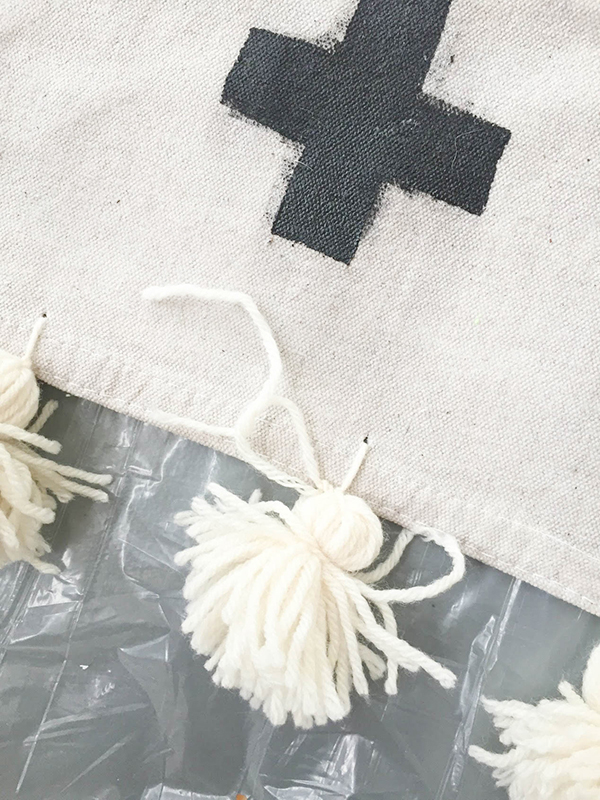
27. Repeat until all tassels are added to the rug

I’d love to see your Trinkets and Love DIYs. If I’ve inspired you to make your own drop cloth rug, show me on Instagram using #mytrinketsandlove.
Like what you see here? Follow along on Instagram, Twitter, and Pinterest and don’t forget to subscribe to the newsletter for exclusive access to the latest news!


4 Comments
Chelsea
June 28, 2018 at 9:08 pm
Oh I absolutely love this!! It’s adorable…great job!
Deanna
July 5, 2018 at 5:07 pm
I absolutely loved making it! Thanks so much, Chelsea!
Blue
July 1, 2018 at 4:08 pm
In this era when everyone is trying to save money, this is very insightful. The interesting thing is that the materials necessary for making the drop cloth rug are readily available everywhere. Everyone should try it.
Deanna
July 1, 2018 at 6:44 pm
So true, Blue! I love sharing creative ideas that anyone can try out!
Comments are closed.